Your Cart is Empty

From time to time, koi will suffer from external parasites. The longer it takes to treat the parasite, the greater the risk of damage to your koi, bacterial infections, or death. Having a microscope, or access to one speeds up the process of treating koi. By examining a mucus sample under a microscope, you can correctly identify the parasite/s at fault and apply the correct treatments, rather than guessing. ‘Shot gun’ treatments waste time, money, prolong effective treatment times, and expose koi to more chemicals than necessary.
In this post, we will look at what features you should look for in a microscope and why they will help you identify koi parasites easily, and how to set up the microscope to view mucus samples, and finally give some useful hints and tips.
When purchasing a microscope, you have to consider how many features you think are essential, and what features are desirable. For us, we use a microscope regularly, so any feature that makes the microscope easy to use is of high value. As we use our microscope for professional use, we also need the best image possible.
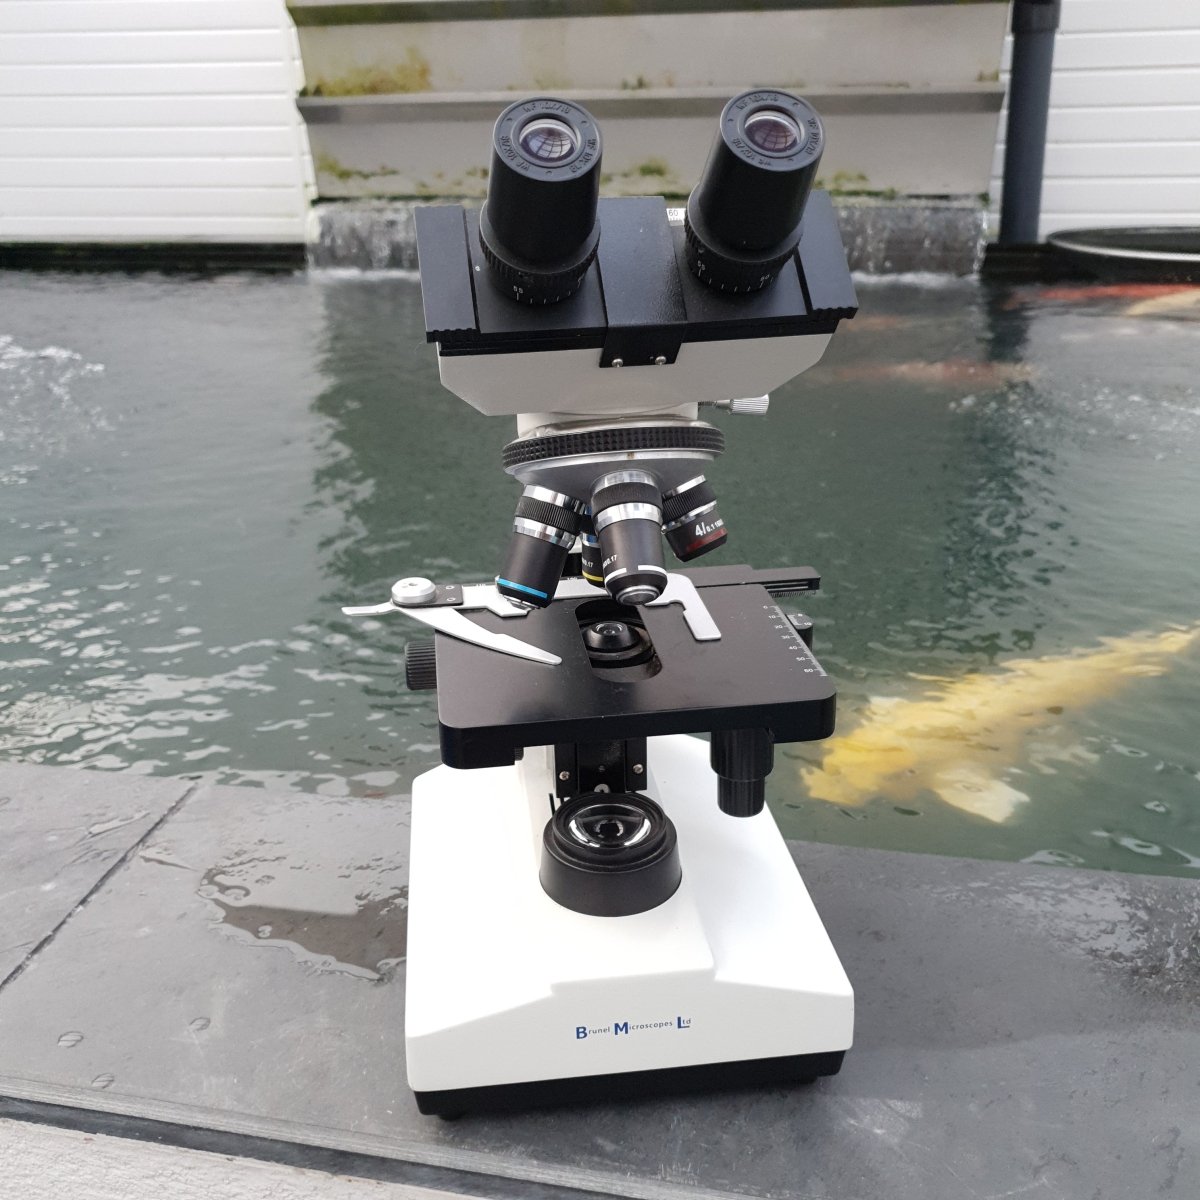
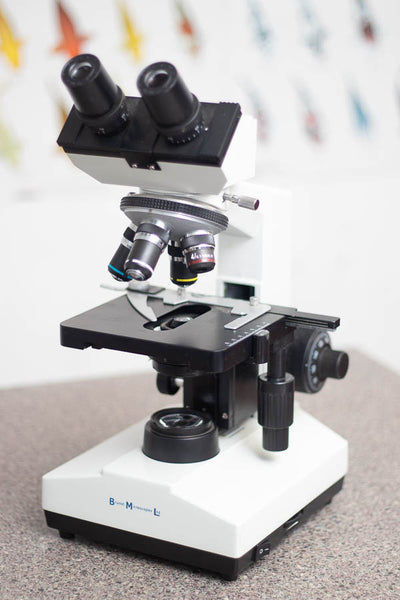
Let's take a look around our microscope, which is a Brunel SP55d. This microscope is definitely overkill for hobby use, we’re not recommending you spend this much!
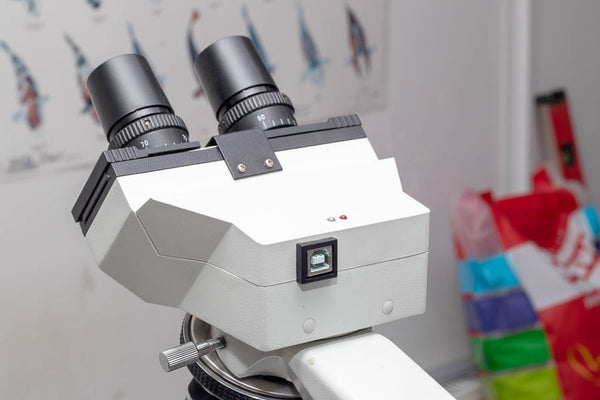
We chose this microscope because it offers comfortable and clear viewing of the image, with it's binocular eyepieces. For infrequent users, a single eyepiece would be fine. Some people find using a single eyepiece can give them headaches, so if you do have any issues with your vision, it would be good to try before you buy, if possible.
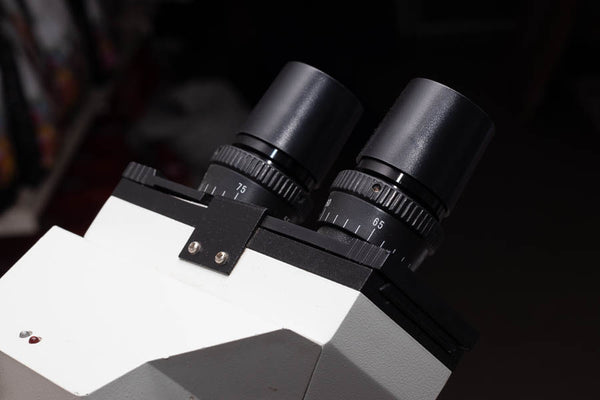
Each eyepiece can be focused to suit your own difference in vision between your eyes, with sliders to space the eyepiece to ensure comfortable viewing. On a single eyepiece microscope, there will still be adjustment in focus to suit your eyesight,
This particular microscope contains a USB digital camera in the head, and can stream images and video to our computer. This can be a very useful feature, especially if you want to share image and video to gather opinions on your findings.
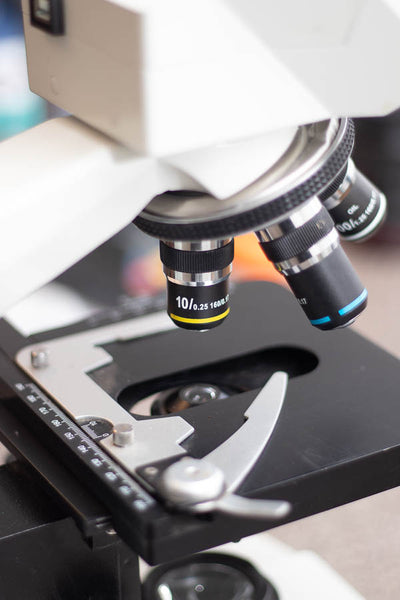
A good microscope for koi parasite identification will contain several objective magnifications, and most microscopes would have a 4x, 10x, 40x and 100x objective power, and when combined with a 10x eyepiece, will give 40x, 100x, 400x, and 1000x. We use the 10x objective and the 10x eyepiece almost exclusively, and find at 100x we can see the smallest koi parasite (Costia) easily, and the largest (Fluke) still fit in view. The objectives are selected by rotating the objective mounting ring.
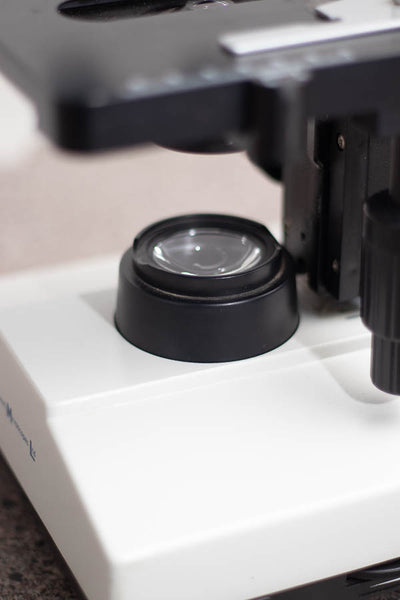
Most microscopes will feature an adjustable light for illumination under the slide. We don’t often have to adjust our light power, but thin and thick mucus may require a different amount of light to provide the best contrast.
The mechanical stage is found on mid to high end microscopes and for koi keepers, it’s probably the most practical feature of any particular microscope. The mechanical stage is where the slide sits, but it moves left to right, and front to back, so that you can easily scan the slide for parasites. When using cheaper microscopes, the slide will be held on to the stage with two spring clips. Moving the slide around is tricky and frustrating - one minute you’re moving slowly, then the slide slips and all of a sudden you’ve missed half of the slide. The mechanical stage is operated by rotating the two knobs, and it is geared so that your movements translate to very small movements of the slide.
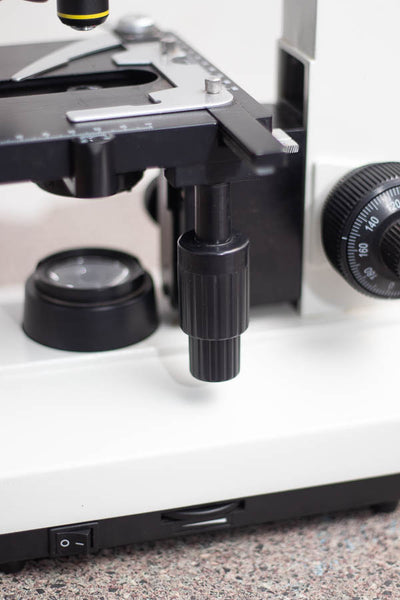
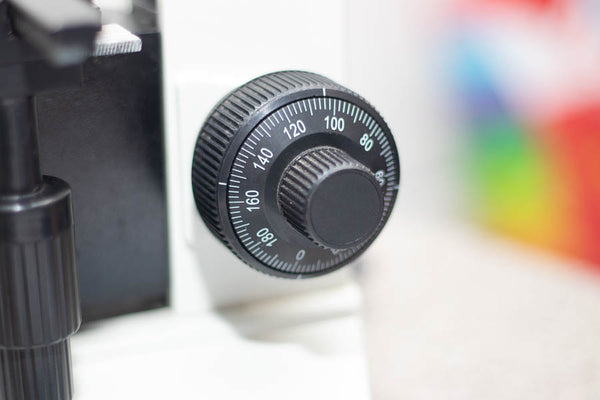
The focus wheel controls the height of the stage, by moving the stage, it brings the slide in to focus. There are two knobs on most microscopes, one which controls the coarse movement, and one which controls the fine movement. If you are the only user of your microscope, the coarse adjustment will only be made initially, and if you change the objective power. The fine focus knob will be in almost constant use as you scan the slide.
There are many makes and models of microscopes available to buy online, including options with built in digital displays. In our experience, the image quality of a cheap digital (less than £100) microscope will never be as good as an optical microscope, such as our Brunel SP55D, or other models from Brunel. You can always add a digital eyepiece to an optical microscope if you would like to capture digital images, or the Brunel SP22D we list on our website is similar to our SP55D, in that it has the digital camera in the head of the microscope, giving the best of both.
In our last blog, How to Take a Mucus Sample/Scrape, we showed you how to collect your mucus sample from your koi. If you have the slides ready now, lets look at how to use the microscope.
You can see all the products listed above here, Microscopes and Accessories.

Comments will be approved before showing up.